
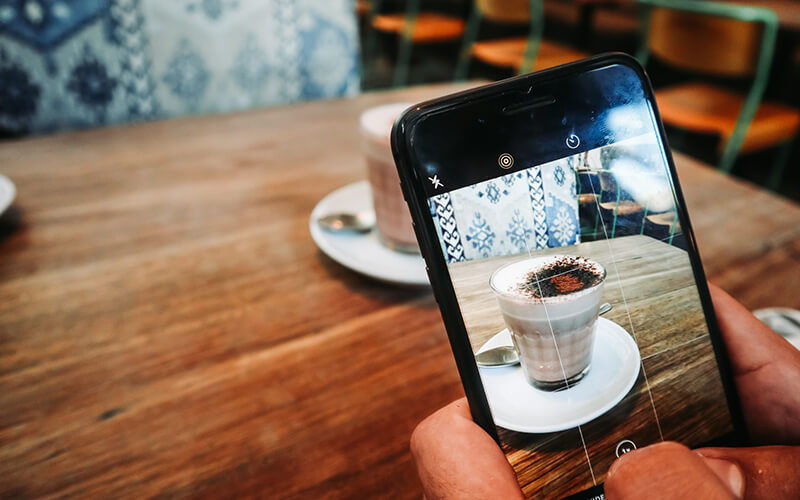
9 Creative Photography Ideas With Your Smartphone!

9 Creative Photography Ideas With Your Smartphone!

To produce aesthetically pleasing snapshots, you don’t necessarily need to use a special camera! It turns out you can still utilize your smartphone to create creative and innovative photos.

Moreover, the minimalist size of smartphones makes them easy to carry anywhere, making it more flexible to capture images when you encounter beautiful subjects. This time, we will discuss creative photography ideas taken using your smartphone.

Inspirational Object Photography Using Your Phone

You can try photographing various interesting objects with your smartphone. No need to worry, here are some inspirational ideas to help you capture images with your phone:

1. Light painting

Light painting is a fun photography subject because you only need to capture the shape of light trails. You can use long exposure and a light source to capture the object.

To capture light paintings, you can use various light sources such as flashlights, fireworks, and light sticks. Place the camera on a tripod and use the bulb setting. Then move the light source while taking the photo.

Another way is to choose a flower subject and illuminate it with a flashlight to create bright spots that result in excellent snapshots.

2. 365 Days Project

This photo subject can be described as both easy and difficult because you don’t need to go anywhere but still have to stand and take photos day by day. You need to choose a theme, texture, color, or people to photograph every day for 365 days or a year.

You can also take any inspiring photos that allow you to capture the subject every day. But if it seems too long and impractical, try a 30-day project, especially for beginners.

See also : Watercolor Painting Techniques for Beginners

3. A-Z Project

This photo subject is quite unique and simple because you only photograph objects forming letters of the alphabet. For example, photographing a street lamp that forms the letter S.

If there are no objects forming letters of the alphabet, you can also create them yourself. For example, making alphabet letters from a row of ants, cracks in branches, biscuits, and so on.

With the right smartphone photography technique, you can get the best results. This project is quite simple and doesn’t take much time.

4. Self-portrait

Have you ever thought of taking self-portrait photos using your smartphone? It turns out that you are also an interesting and creative photo subject if you can use the right photography techniques with your smartphone.

For cool photo ideas, you can take selfies all day long by changing settings. You don’t have to use a DSLR camera because your smartphone is the best alternative for producing quality snapshots.

For example, document your day by taking photos of your activities such as starting the day with breakfast, being on public transportation, working at your office desk, going for lunch, and until night.

5. Documentary

Documentary photos are also a creative idea for photography subjects with excellent results. Documenting an event or history can produce very attractive photo patterns.

You can start by traveling to a place and photographing a current or past event. Some objects that can be documented include protest actions, social phenomena, war zones, world events, and various other life events.

6. Patterns

Have you ever thought of photographing patterns as interesting photo subjects? You certainly encounter various patterns everywhere, such as spider web patterns, close-up leaves, hotel room window patterns, and so on.

Even if you don’t travel, you can still get pattern objects or create them yourself, such as aligning stones in rows or photographing neatly arranged shoes.

7. Optical Illusions

Optical illusion objects are very interesting photo subjects, and many photographers have captured optical illusions. Actually, it’s very easy because it’s just a visual illusion, so you can use special tricks.

For example, place someone close to the camera to make them appear as large as the background, so their size looks the same as the background building.

See also : 12 Wood DIY Projects for Beginners

8. Rainbow Colors

Rainbows have very beautiful colors, making them very interesting and creative subjects to capture. You can take snapshots of rainbow colors with your smartphone camera. However, make sure that the snapshots are clear and the colors appear on the camera.

9. Mosaic

You can produce mosaic photos using your smartphone by placing various photos with different colors on the canvas to form another image.

For example, if you make a blue-eyed picture, you can place various photos showing blueness on the canvas to form the desired eye object.

Photography Tips With Just Using Your Smartphone

There are several practical tips you can follow to produce the best photo snapshots using your smartphone.

• 108 MP Resolution Camera

To produce quality images, you can use the rear camera of your smartphone, which generally has better quality than the front camera. The rear camera has a larger sensor and megapixels, resulting in clearer images.

To take photos from a distance, you can use the zoom feature as a practical way. However, sometimes the zoom feature on a smartphone camera reduces photo quality, unlike professional camera lenses. Unless your smartphone already uses 3x In-sensor Zoom technology, which produces better snapshots.

• Using Additional Camera Features

You also need to use other camera features to support photo quality. For example, if you want to focus on the main object, use the portrait feature with a bokeh effect. You can also use manual control to improve the quality of the area you want to focus on.

• Adequate Lighting

Try to find locations with sufficient lighting to get quality photos. If the camera receives sufficient light, it can work faster, and the resulting photos will be more detailed. Also, use the night mode feature on your smartphone.

• Editing Photos

If you want to print or share the photo results, try editing or retouching them first. Sometimes good atmosphere and objects viewed by the eye become less attractive when captured through the camera.

Try to edit photos to get clearer image quality. You can use editing tools on your smartphone or additional editing applications. Also, try to edit photos as naturally as possible.

That’s an Mjcarew.com explanation of some creative photography ideas with your smartphone along with tips you can do to optimize the photo results. You don’t have to use photography equipment; you can also utilize your smartphone to produce quality images.
Watercolor Painting Techniques for Beginners

Watercolor Painting Techniques for Beginners

Painting activities are now increasingly popular among various groups of people because they offer many benefits. Being one of the enjoyable hobbies to pursue, painting can also help reduce anxiety and stress levels. Below are some watercolor painting techniques specifically for beginners who want to unleash their creativity.

Watercolor Painting Techniques for Beginners

Painting is generally done using canvas and watercolor, employing specific techniques to produce beautiful results. At first glance, painting with watercolor may seem easy to do. However, watercolor has its own characteristics—it dries quickly and leaves little room for error.

Watercolor is a painting medium that uses pigment as a water-soluble solvent and has transparent properties. Painting media with watercolor can vary from canvas, paper, leather, fabric, wood to papyrus. Mastering watercolor painting techniques and developing them well allows you to draw anything you desire. Here are some techniques for painting with watercolor for beginners:

1. Wet in Wet

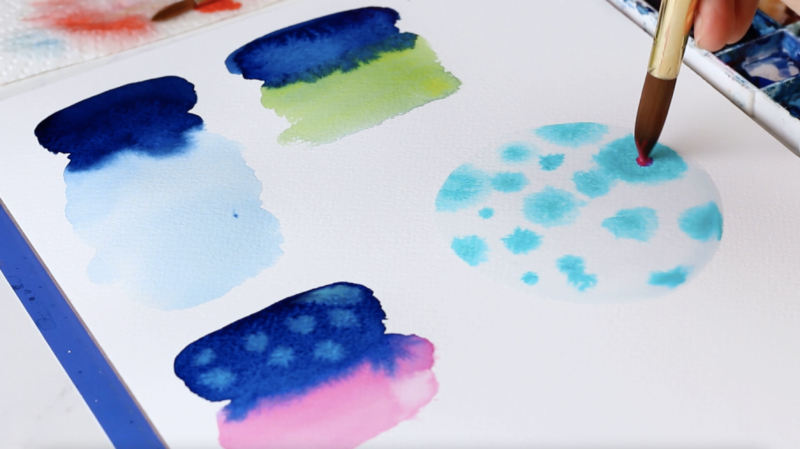
The wet-in-wet technique involves applying color to pre-moistened painting paper. The result of painting with this technique appears faded, with the degree of fading depending on how wet the paper is. This painting technique can also be used after washes technique, provided that you wait for the paper to dry.

2. Flat Wash

Watercolor painting technique involves wetting the painting paper with water before applying color. The purpose of this technique is to facilitate color mixing on the painting paper. Coloring the paper can also be done by moving horizontally, moving from top to bottom, or with overlapping movements.

3. Glazing

The next painting technique is glazing, which is quite similar to the washes technique. However, in this painting technique, thin and transparent brush strokes are made on the dried painting surface. The purpose of this technique is to make improvements to previous coloring processes that may be deemed unsatisfactory.

See also : 12 Wood DIY Projects for Beginners

4. Dry Brush

The opposite technique of wet-in-wet involves applying watercolor to the dry surface of the paper. The purpose of this technique is to make the painting look fresh, realistic, and dry. Moreover, using this technique can also help determine the painting theme effectively.

5. Lifting Off

The last technique involves removing applied watercolor from dry paper or painting media. However, it is recommended to avoid certain colors that are difficult to lift off, such as magenta, black, and navy blue. The process of removing watercolor can be done by moistening the area to be removed with a brush and water, then absorbing the color with tissue and paper to cover other areas.

Things to Consider when Painting with Watercolor

When painting with watercolor, there are also several important things to consider:

a. Use a color palette

For beginner painters, it is highly recommended to use a color palette to obtain more colors for painting with better quality. You can create various types of secondary and tertiary colors using primary colors such as blue, red, and yellow. Use plastic or wooden pallets that can be washed after use, but you can also use disposable paper palettes for practicality.

b. Provide two clean water glasses

After preparing the watercolor to be used, do not forget to provide 2 clean water glasses next to the painting area. You can use one glass of clean water to wash the painting brush after using a certain color, and use the second glass to moisten the clean brush and dip it before painting. Replace the water in the glass with clean water immediately if it appears murky with black or brown color.

c. Moisturize the brush with clean water

Make it a habit to always moisten the painting brush with clean water before applying it to the paper or painting media. To obtain a brush with a pointed tip, you can hold the brush and shake it while the brush is still wet. Do this on tissue paper so that water and watercolor do not splash everywhere.

d. Mix the color

Before applying watercolor to the painting media, you can mix it with water first. For colors with dense pigments, you can add more water so that they do not lose their color density. Meanwhile, for colors with soft pigments, you only need to add a little water so that the color remains soft but not too thick.

e. If using bottled paint

You can transfer a little watercolor from the bottle to an empty palette hole, then add a little water and stir it in a circular motion to even out the color. Make sure not to add too much water so that the watercolor does not become too thin or faded. If you want to mix two colors, make sure to do it in another new palette hole.

See also : 22 Cozy Winter Scarf Knitting Patterns

f. Brush strokes and observe the results

When starting to apply watercolor to the painting media, you can stroke the brush from one side to the other, creating thick lines. Then tilt the drawing paper so that the watercolor can flow down and not pool on the surface of the paper or painting media. You may notice that the watercolor on the painting paper is much lighter than the watercolor in the bottle, but it still appears harmonious in color.

g. Wait until the painting dries

After finishing the watercolor painting process, it is recommended to wait and let the painting dry completely, approximately for 30 minutes. Avoid touching or rubbing the painting surface if you do not want the painting to change or be damaged. After the watercolor dries, the painting colors usually appear lighter than when the painting was wet.

These are some Mjcarew.com tips for painting with watercolor specifically for beginners:

  • Learn the characteristics and colors of watercolor by trying to apply them on painting paper to understand how dark or light the colors are.
  • Color the painting by starting with light colors before using dark colors.
  • Try to use high-quality brushes with characteristics of bristles that are not easily loose or shed so that you can produce good painting results.
  • Make sure to know the type of paper used so that you can paint with the best results.

That concludes a brief explanation of watercolor painting techniques for beginners that you can master first to create captivating paintings. You can practice brushing on paper or canvas frequently to understand the color characteristics and get good painting strokes.